
This time we’ll be looking at another really simple image effect that can be used as a building block for more complex and overall sexier effects: Displacement. The name says it all; it just displaces the image by manipulating the UV coordinates. As a result, the output image can be moved in the x and y axis. This sounds useless and unnecessary, I know. However, if we combine this effect with a mask or some displacement guides, either as an image effect or a grab pass shader, displacement can give some really cool results.
The shader I will go through is again not complex at all and it uses masks in the simplest way, as shown in a previous post. Hence, using this image effect will need a mask that has the same aspect ratio as your game, which is pretty limiting. But at some point in the future we’ll talk about making custom masks in-shader which are much more flexible.
Let’s check out the code!
Shader "Custom/SimpleDisplacement"
{
    Properties
    {
        _MainTex ("Texture", 2D) = "white" {}
        _DisplacementMask("Displacement mask", 2D) = "white"
        _DisplacementAmount("Displacement amount", float) = 0
    }
    SubShader
    {
        // No culling or depth
        Cull Off ZWrite Off ZTest Always

        Pass
        {
            CGPROGRAM
            #pragma vertex vert
            #pragma fragment frag

            #include "UnityCG.cginc"

            struct appdata
            {
                float4 vertex : POSITION;
                float2 uv : TEXCOORD0;
            };

            struct v2f
            {
                float2 uv : TEXCOORD0;
                float4 vertex : SV_POSITION;
            };

            v2f vert (appdata v)
            {
                v2f o;
                o.vertex = UnityObjectToClipPos(v.vertex);
                o.uv = v.uv;
                return o;
            }

            sampler2D _MainTex;
            sampler2D _DisplacementMask;
            float _DisplacementAmount;

            fixed4 frag (v2f i) : SV_Target
            {
                fixed4 displ = tex2D(_DisplacementMask, i.uv);
                float2 displ_uv = i.uv + displ * _DisplacementAmount;
                fixed4 distortedCol = tex2D(_MainTex, displ_uv);
                return distortedCol;
            }
            ENDCG
        }
    }
}
Really simple stuff here, as you can see. In the properties block I add another field for the mask texture and a float for the amount of displacement. Nothing extraordinary there.
After those fields are redeclared in lines 43 and 44, I play around in the fragment shader. Most of the previous examples had something to do with manipulating the color of the output. This time, however, I don’t do anything to the color. I just mess with the UV coordinates. First, I have to take the colors of the mask and store them. Since the mask is in grayscale, my “displ” variable will end up with lots of black, white and gray values that will determine whether the area the correspond in the screen will have no displacement, all the displacement or part of the displacement respectively.
After I get my mask’s colors, I calculate the new UV coordinates. Those coordinates will be the same as the screen’s but I will also add the color of my mask multiplied by the displacement amount I want. Therefore, in the black areas of the mask the UV coordinates will stay the same, in the white areas they will be displaced by the displacement amount and in the gray areas they will be displaced by a fraction of the displacement amount based on the brightness of the gray.
Finally, after calculating the new UV coordinates, we get the color of the camera output using the tex2D function. But, instead of using “i.uv” as the second argument, we pass the newly calculated UVs. Then we return the color and we’re golden!
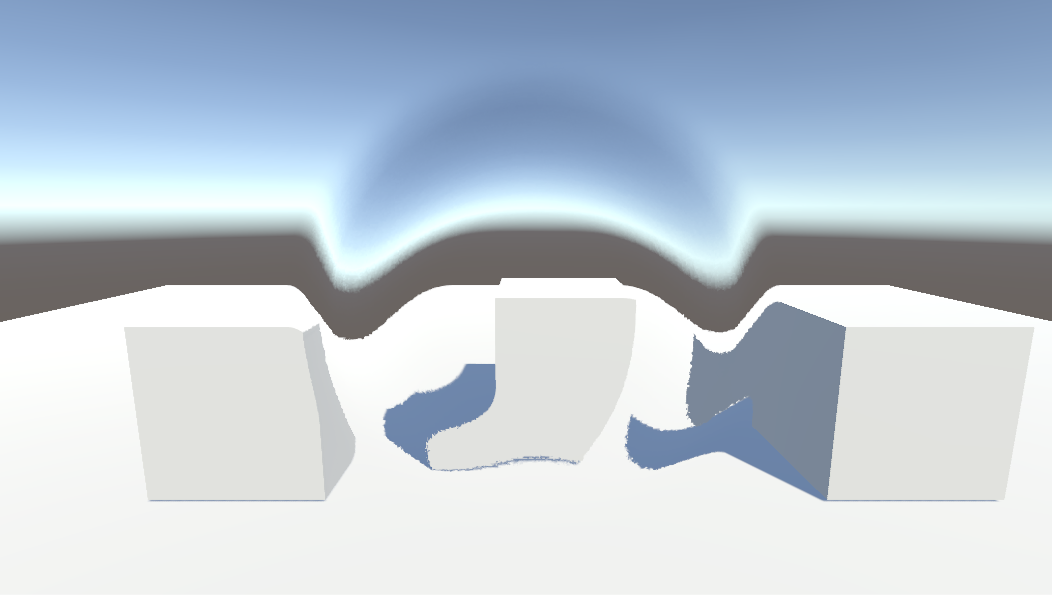
As you can imagine, depending on what mask you use, the effect can change significantly. For example, using the mask mentioned in the post about masks, the result is this:
 which, at least for me, it makes no sense. But maybe you can find some applications for it.
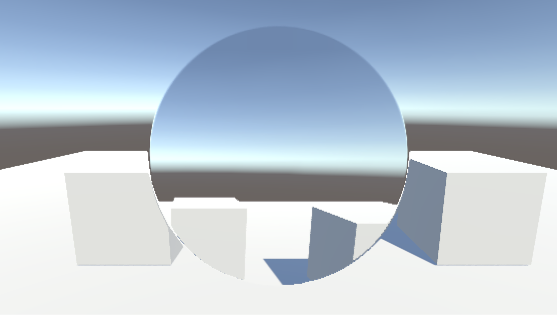
On the other hand, with a mask like this:

You get this result:
 (O.M.G. THAT’S THE FEATURED IMAGE OF THIS POST)
Since this shader does not provide any control with these masks, manipulating the size and position of this displacement donut is not directly possible. However, imagine this donut appearing in a position in the screen and quickly getting bigger in radius until it disappears. Then you will have a cool shockwave effect on your hands! So, it’s generally a good idea to use soft edged masks for these effects.
Still we’re not looking at something amazingly exciting, but i believe that this kind of effects are good for beginner’s to get into shaders. And even simple stuff like the ones I’ve been posting about can have an impact on the overall feel and looks of your project. As long as they’re used well that is.
See you in the next one!


