
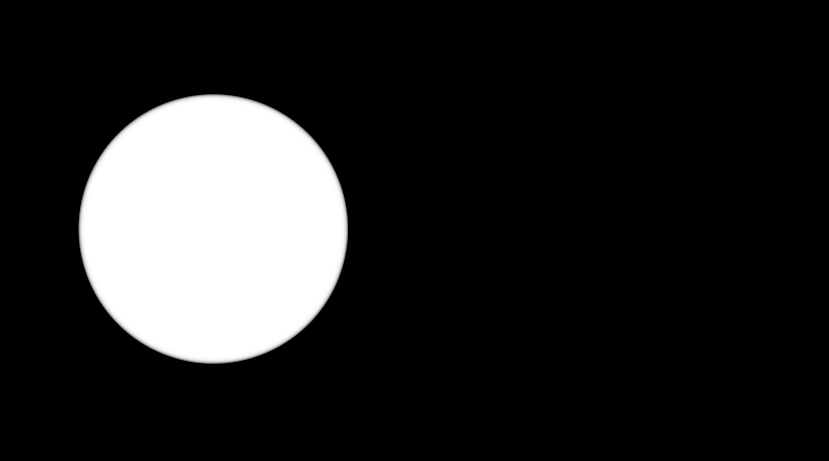
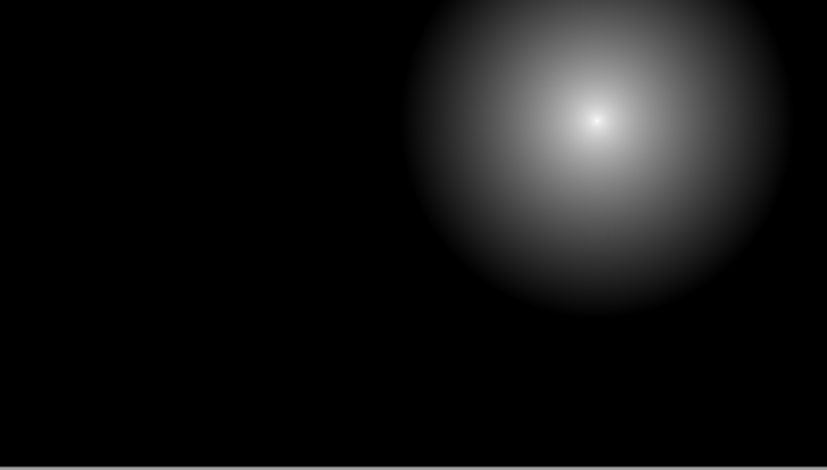
I’ll be straight with you, this is one of the shader areas for which I’m not really comfortable to make tutorials. We’re treading on grounds of code that I can understand but not completely think to write on my own without a reference. The shader I will be demonstrating in this post is pretty small and simple, however I’ve been using it as a black box for a while, without actually being sure of how it does what it does. It took me some reverse engineering in order to be able to understand how it works well enough to explain it. This statement makes it really obvious that I didn’t write this shader, I actually found a more complicated version of it (which actually made rings, not discs) and tweaked it to make discs and to be a bit simpler. Now that my confession’s out of the way, let’s move on to the subject at hand: the shader for a custom mask. Specifically, this shader is used to render a disc mask of which you can adjust the radius, center, size and hardness. That way, you won’t have to use pre-made mask textures that work for specific resolutions or aspect ratios. Furthermore, having all those parameters makes this mask really flexible in lots of ways. This shader can be tweaked to make your game screen look like this:


Isn’t this extremely useful for every type of game imaginable? If you said “yes”, you’re lying to me and you’re lying to yourself. This “image effect” is completely useless on it’s own. The shader’s purpose is to be used as a building block in the same way it was shown in the simple masks post. Using this code you will end up with black and white values that you can use as you wish. Also, since this mask is completely customizable you can change the radius, the hardness and other details using scripts, making all sorts of cool effects. The possibilities are figuratively endless and I’m not going to list them for you; you can probably think more than me.
Enough stalling, let’s see some code:
Shader "Custom/DiscMask"
{
	Properties
	{
		_MainTex ("Texture", 2D) = "white" {}
		_Radius("Radius", float) = 1.0
		_CenterX("CenterX", float) = 0.5
		_CenterY("CenterY", float) = 0.5
		_SizeX("SizeX", float) = 1
		_SizeY("SizeY", float) = 1
		_Hardness("Harndess", float) = 1.0
		_Invert("Invert", Range(-1.0, 1.0)) = 0
	}
	SubShader
	{
		// No culling or depth
		Cull Off ZWrite Off ZTest Always

		Pass
		{
			CGPROGRAM
			#pragma vertex vert
			#pragma fragment frag

			#include "UnityCG.cginc"

			struct appdata
			{
				float4 vertex : POSITION;
				float2 uv : TEXCOORD0;
			};

			struct v2f
			{
				float2 uv : TEXCOORD0;
				float4 vertex : SV_POSITION;
			};

			v2f vert (appdata v)
			{
				v2f o;
				o.vertex = UnityObjectToClipPos(v.vertex);
				o.uv = v.uv;
				return o;
			}

			sampler2D _MainTex;
			float _Radius;
			float _Hardness;
			float _CenterX;
			float _CenterY;
			float _SizeX;
			float _SizeY;
			float _Invert;

			fixed4 frag (v2f i) : SV_Target
			{
				fixed4 orCol = tex2D(_MainTex, i.uv);
				float dist = length(float2(i.uv.x - _CenterX, i.uv.y - _CenterY) * float2(_SizeX,_SizeY));
				float circle = saturate(dist/_Radius);
				float circleAlpha = pow(circle, pow(_Hardness, 2));
				float a = (_Invert > 0) ? circleAlpha * _Invert : (1 - circleAlpha) * (-_Invert);
				half4 col = (orCol.rgb, a * orCol.a);
				return col;
			}
			ENDCG
		}
	}
}
Properties
First thing you’ll notice: a bunch of properties. Way more than we’re used to until now. That, my friend, is the price of flexibility. Let’s go through them, one by one:
- _MainTex: You already know what this does, if you don’t check out my first post on image effects.
- _Radius: The radius of the disc that is our mask. Duh.
- _CenterX / _CenterY: The coordinates for the center of the disc. Those are in screen coordinates, so (0,0) for bottom-left corner, (1,1) for top-right corner.
- _SizeX / _SizeY: The size of our disc on the X and Y axis. BUT WAIT! Isn’t this determined by the “_Radius” property? In a sense, yes it is. But here’s the thing: this technique won’t produce a perfectly circular disc out of the box, because of the way it uses the UV coordinates of the screen. Since there are not any 1:1 aspect ratio screens out there that I know of, our “disc” will have more of an elliptical shape. The _SizeX and _SizeY are used to make the disc’s dimensions independent from the screen aspect ratio. Therefore, in a 16:9 aspect ratio, setting _SizeX as 1.6 and _SizeY as 0.9 will give you a perfect circle.
- _Invert: A parameter used to invert the mask or lower it’s intensity.
As always, in lines 47-54 I redeclare all of those properties inside the shader. Now let’s move to the fun parts!
Fragment shader
Before I start explaining what’s going on here, you might want to pause for a second and undermine my intelligence. I mentioned that this was one of the shaders that were not completely clear to me; but you can see that there are just 5 lines of code there that are not a “tex2D” call or a “return” statement. Just 5! But let me assure you, these are 5 really counter-intuitive lines of code to draw a disc. There are no sin/cos functions involved, or any fancy circle equations. Just pure fragment shader stuff. And being able to just think like that is probably the hardest thing when it comes to shaders. So let’s dive in these 5 lines of code!
No surprises in line 58, just getting the color of the screen. It’s obvious that I’m not actually using it somewhere, but I just kept it in the shader since I will need it in almost every case. Line 59 on the other hand, is where things start to get a bit messy. In order to understand it, I need to be a bit clear about what “i.uv” really is. As I hope I mentioned before, the fragment shader is a function that runs for every pixel every frame and assigns a color to it. So, even if there’s not a visible “while” or “for” loop, it’s actually looping over all the pixels. The “i.uv” inside this function is basically the coordinates of the pixel we’re examining at a specific call of the “frag” function. The x and y coordinates of “i.uv” are screen coordinates, so they’re in the [0.0, 1.0] spectrum. I know that now it seems as if I lied in previous posts, but if lying made those posts easier to understand, I regret nothing. What line 59 actually does is take a vector that represents the distance of the pixel we’re examining from the center of our disc. Then it multiplies that vector by the _SizeX and _SizeY parameters to adjust it based on the screen aspect ratio. Finally, it gets the length of that vector and stores it as a float named “dist”.
Let’s move on to line 60. Really simple line, it just divides the “dist” number by the radius of our disc and then uses the “saturate” function on it. Not being a native English speaker, this function confused me a lot in the past. For some reason I thought it did something extremely complicated, maybe because I thought it had something to do with color saturation. All it does, however, is clamp it’s input between 0.0 and 1.0. That’s it. The clamped value is then stored in a float named “circle”. Using this instead of “circleAlpha” in line 62 would still give us a pretty nice feathered disc. The way that works is like so: for every i.uv we calculate the distance from the center of the disc and we store it in “dist”. When we divide this by the disc radius we’ll get a number larger than 1.0 if the distance is greater than the radius, and a value from 0.0 to 1.0 otherwise. Using these numbers as a color value will give us a disc with a very dark center that fades out to white. Since the value is clamped, the maximum value of “circle” will be 1.0, which will give us “white”. The division is used to give us a range of numbers in order to have the smooth effect. If we didn’t care about the smoothness, we could just write this:
float circle = (dist < _Radius) ? 0.0 : 1.0;
However, the ability to control the hardness of our mask is really important, and that’s what line 61 is for. It raises the value of “circle” to the power of the “_Hardness” parameter which, in its turn, is raised to the power of 2. As it’s hopefully known, if a number smaller than 1 is raised to a power it gets even smaller. That’s why raising the value of “circle” to a power will make it even darker, making it less smooth until it becomes a solid, crisp disc. The reason I also raise the “_Hardness” value to the power of 2 is so that I can have a completely solid disc when I give “_Hardness” a value of 13. If I just said “float circleAlpha = pow(circle,_Hardness);”, I’d need to set the value of “_Hardness” to 180. Which is not cool. Plus, that way I can also make “_Hardness” a negative number. I wouldn’t do it, but it’s nice to have the option. Besides, raising a property to a power to make its range more reasonable is a pretty common practice. After all that, I just store the new value to a float named “circleAlpha”. I’m not always good with variable names.
In line 62 I apply the “_Invert” parameter in order to be able to invert the mask, as well as to reduce it’s power. “_Invert” is a float from -1.0 to 1.0. When it’s positive, I store the value of “circleAlpha” multiplied by the value of “_Invert” in order to control it’s power. If “_Invert” is 1.0 then the mask will be dark inside and the area around the disc will be completely white. For any value between 0.0 and 1.0, the area around the disc will be black to very very light gray. In case the value of “_Invert” is negative, the mask will be inverted and it will be again multiplied by the corresponding positive value of “_Invert” to adjust the brightness of the disc, while the rest of the area is completely dark. The modified value is then stored in a float named “a”.
Finally, in line 63 I make a new half4, where the first 3 values are the rgb values of the original color of the screen and the “a” value is multiplied with the alpha value of the original color. After that, I just return the color and I’m finished.
Conclusion
Lots of words for 5 lines of code, don’t you think? If I were you, I wouldn’t read a word from all of that. I would just get the code, I wouldn’t care about how it works and I would just use it as it is. It’s not bad to use “black boxes”, especially when it comes to shaders. If you can achieve an effect on purpose, without being sure about how your code works, it’s good enough. That is as long as you don’t do anything extremely wrong that kills the performance of your game.
There will be a second part soon where it uses a similar technique to generate ring masks, which are far more useful. For example, one really common use for this type of masks is a shockwave, by adding displacement on a ring mask. You are obviously free to experiment with the disc mask to achieve the ring mask effect. I mean, I can’t stop you. Not physically at least.
That’s all for now, it’s been a pretty long post. See you in the next one!


